Milkweed is more than just a wildflower—it’s a lifeline for monarch butterflies and a vital part of many ecosystems. If you’re interested in supporting pollinators or simply want to propagate more milkweed in your garden, learning to harvest milkweed seeds and efficiently remove the fluffy “coma” is essential. This detailed guide will walk you through every step, from identifying ripe pods to storing clean seeds for future planting.
Why Harvest Milkweed Seeds?
Milkweed (Asclepias spp.) is crucial for monarch butterflies, serving as the only host plant for their caterpillars. With milkweed populations declining due to habitat loss, harvesting and planting local milkweed seeds can directly help monarchs and other pollinators12. Collecting seeds from local ecotypes also ensures your plants are well-adapted to your climate and soil1.
When to Harvest Milkweed Seeds
Timing is Everything
-
Too Early: Seeds will be immature (white or tan), won’t germinate well, and are difficult to separate from the fluff127.
-
Too Late: The pod bursts open, and seeds are dispersed by wind, leaving you with a messy, fluffy situation127.
How to Check for Readiness:
-
Pod Color: Pods can still be green when ready, but they should be starting to dry out and may show brown streaks7.
-
Seed Color: Mature seeds are dark brown and leathery. If seeds are white, cream, or pale, leave them to mature longer127.
-
Pod Test: Gently squeeze the seam of the pod. If it pops open easily, the seeds are likely ready. If not, wait a few more days178.
Best Harvest Window: Late summer through early fall, but timing varies by region and species27.
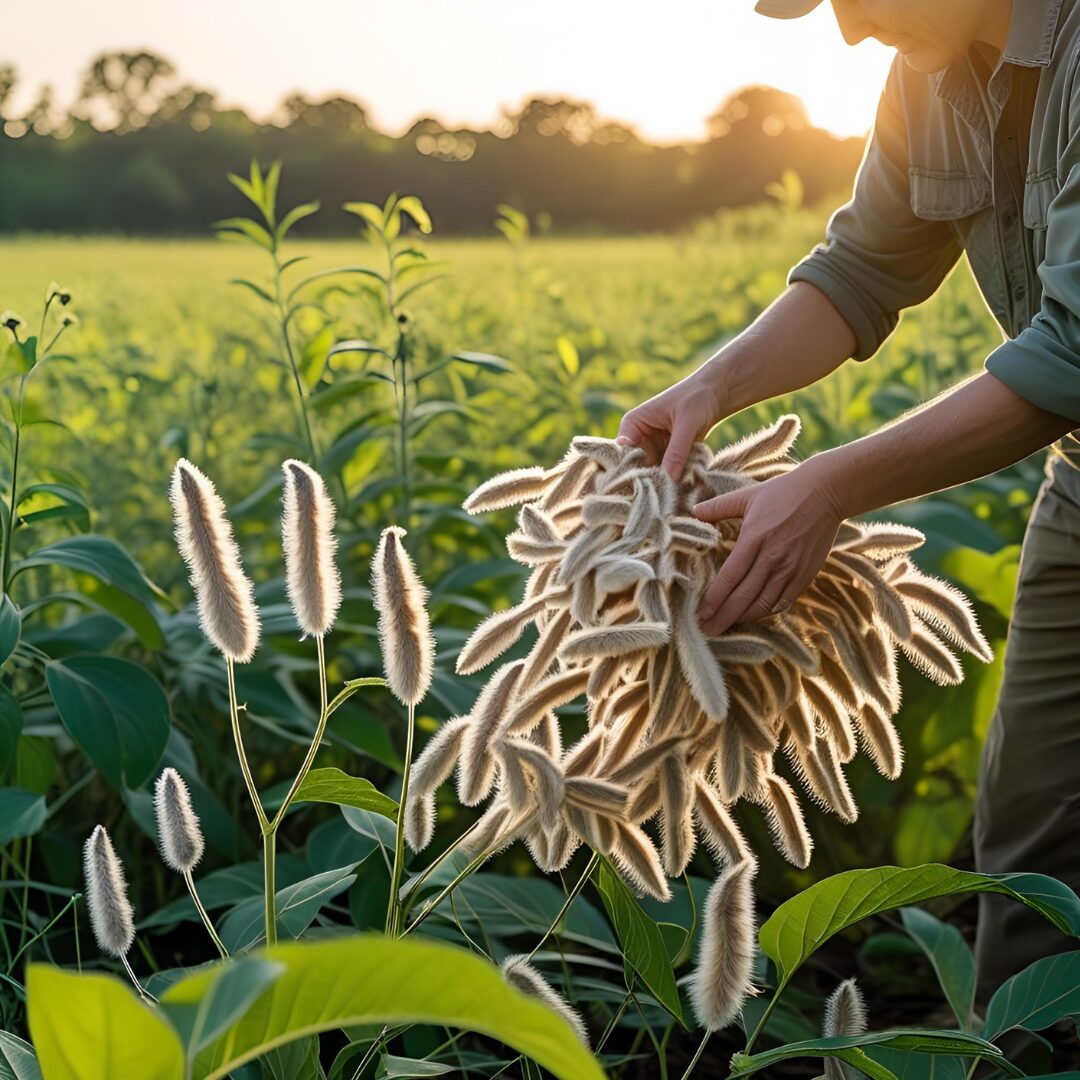
How to Harvest Milkweed Pods
-
Scout for Pods: Look for mature milkweed plants in your garden, along roadsides (with permission), or in wild areas27.
-
Check for Bugs: Avoid pods covered with milkweed bugs (red and black insects), as they often indicate non-viable seeds1.
-
Harvest Responsibly: Only take up to one-third of the pods from any given patch to allow natural reseeding and support wildlife27.
Step-by-Step: Removing Seeds from the Pod
Step 1: Collecting the Pods
-
Use a breathable bag (paper or cloth) or a cardboard box to collect pods—avoid plastic, which can trap moisture and cause mold27.
-
If you want to prevent pods from bursting before you collect them, secure them on the plant with a rubber band, twist tie, or organza bag6.
Step 2: Drying the Pods
-
Let the pods dry for 1–2 weeks in a well-ventilated area. This makes the seeds easier to remove and reduces mold risk27.
Step 3: Extracting the Seeds
There are several effective methods for separating seeds from the fluff:
A. Manual Separation (Best for Small Batches)
-
Remove the Seed Mass: Grab the narrow end and gently pull out the central stalk with seeds and fluff attached17.
-
Strip Seeds: Pinch the seed mass near the top and use your thumb to slide seeds off the stalk, working with the grain. The seeds should fall away easily, leaving a ribbon of fluff127.
-
Repeat: Work your way down the mass, collecting seeds in a container.
B. Rolling Method
-
Roll each dry pod between your palms. The pressure releases seeds from the fluff, which can then be poured out and separated by hand5.
C. Paper Bag and Coin Method (Great for Fluffy Messes)
-
Place Seeds and Fluff in a Paper Bag: Add a few coins.
-
Shake Vigorously: The coins help break up the fluff and separate the seeds67.
-
Pour Out Seeds: Cut a small hole in a bottom corner of the bag and shake out the seeds, leaving the fluff behind67.
D. Wet Separation (If Fluff is Unmanageable)
-
If the fluff is overwhelming, lightly mist the seed mass with water. The moisture mats down the fluff, making it easier to pull away the seeds. Let the seeds dry thoroughly afterward to prevent mold6.
Step 4: Final Drying and Cleaning
-
Spread the cleaned seeds on cardboard, newspaper, or a screen in a well-ventilated area for 3–7 days to ensure they are fully dry2.
-
Remove any remaining bits of fluff by hand or with a gentle breeze or fan (winnowing)5.
Step 5: Storing Milkweed Seeds
-
Store dried seeds in paper envelopes or breathable containers. Label with species and date27.
-
Avoid plastic bags, which can trap moisture and promote mold27.
-
For best germination, seeds require cold stratification: either store them in a cool, dry place over winter or sow outdoors in late fall to let nature do the work2.
Tips and Troubleshooting
-
Mold Prevention: Always dry seeds thoroughly before storage.
-
Immature Seeds: If seeds are pale or don’t separate easily, they aren’t mature—discard these57.
-
Fluff Management: If a little fluff remains, it won’t harm germination but can be removed by hand or with a fan5.
-
Seed Viability: Only brown, firm seeds are viable. Discard any that are shriveled, white, or soft127.
Creative Uses for Milkweed Fluff
-
Milkweed fluff was historically used as flotation material and can be used for pillow stuffing, crafts, or left outside for birds to use as nesting material1.
Frequently Asked Questions
: Can I harvest pods after they’ve burst?
A: Yes, but it’s messier. Use the paper bag and coin method to separate seeds from the fluff67.
: What if I missed the fall harvest?
A: Occasionally, viable seeds can still be collected in early spring, especially if they’ve naturally undergone cold stratification outdoors2.
: How many seeds are in a pod?
A: Some pods can contain over 200 seeds7.
Conclusion
Harvesting milkweed seeds and removing the fluff may seem daunting, but with the right timing and simple techniques, it’s a rewarding process that supports pollinators and helps restore native habitats. Whether you’re collecting seeds for your own garden, to share with friends, or to donate to conservation groups, following these steps will ensure you have clean, viable seeds ready to sow.
By participating in milkweed seed collection and propagation, you’re making a tangible difference for monarch butterflies and the broader ecosystem—one pod at a time.
“Harvesting milkweed seed is all about timing. Too soon and the seed will be immature and won’t germinate, too late and it will have either blown away or involve a flossy mess you’ll need to deal with before sowing.”1
:
1 Xerces Society
2 Save Our Monarchs
5 Fruition Seeds
6 Monarch Butterfly Garden
7 Savvy Gardening
Citations:
- https://xerces.org/blog/harvesting-milkweed-seed-pod-and-plan
- https://www.saveourmonarchs.org/blog/collecting-milkweed-seeds-101
- https://www.nrcs.usda.gov/plantmaterials/idpmctn13442.pdf
- https://www.youtube.com/watch?v=wyvwnSNIL9Q
- https://www.fruitionseeds.com/learn/blog/how-to-harvest-milkweed-seeds/
- https://monarchbutterflygarden.net/harvest-milkweed-seeds-no-fluff/
- https://savvygardening.com/milkweed-pods/
- https://westcook.wildones.org/2017/09/10/resources-to-learn-about-harvesting-milkweed-seeds/
- https://www.canr.msu.edu/news/help_monarchs_and_other_pollinators_by_collecting_milkweed_seeds_this_fall


